本节引言:
1.相关常识的普及:
RGBA模型:
一些名词:
- 色调/色相——物体传递的颜色

- 饱和度——颜色的纯度,从0(灰)到100%(饱和)来进行描述

- 亮度/明度——颜色的相对明暗程度

2.ColorMatrix的解读
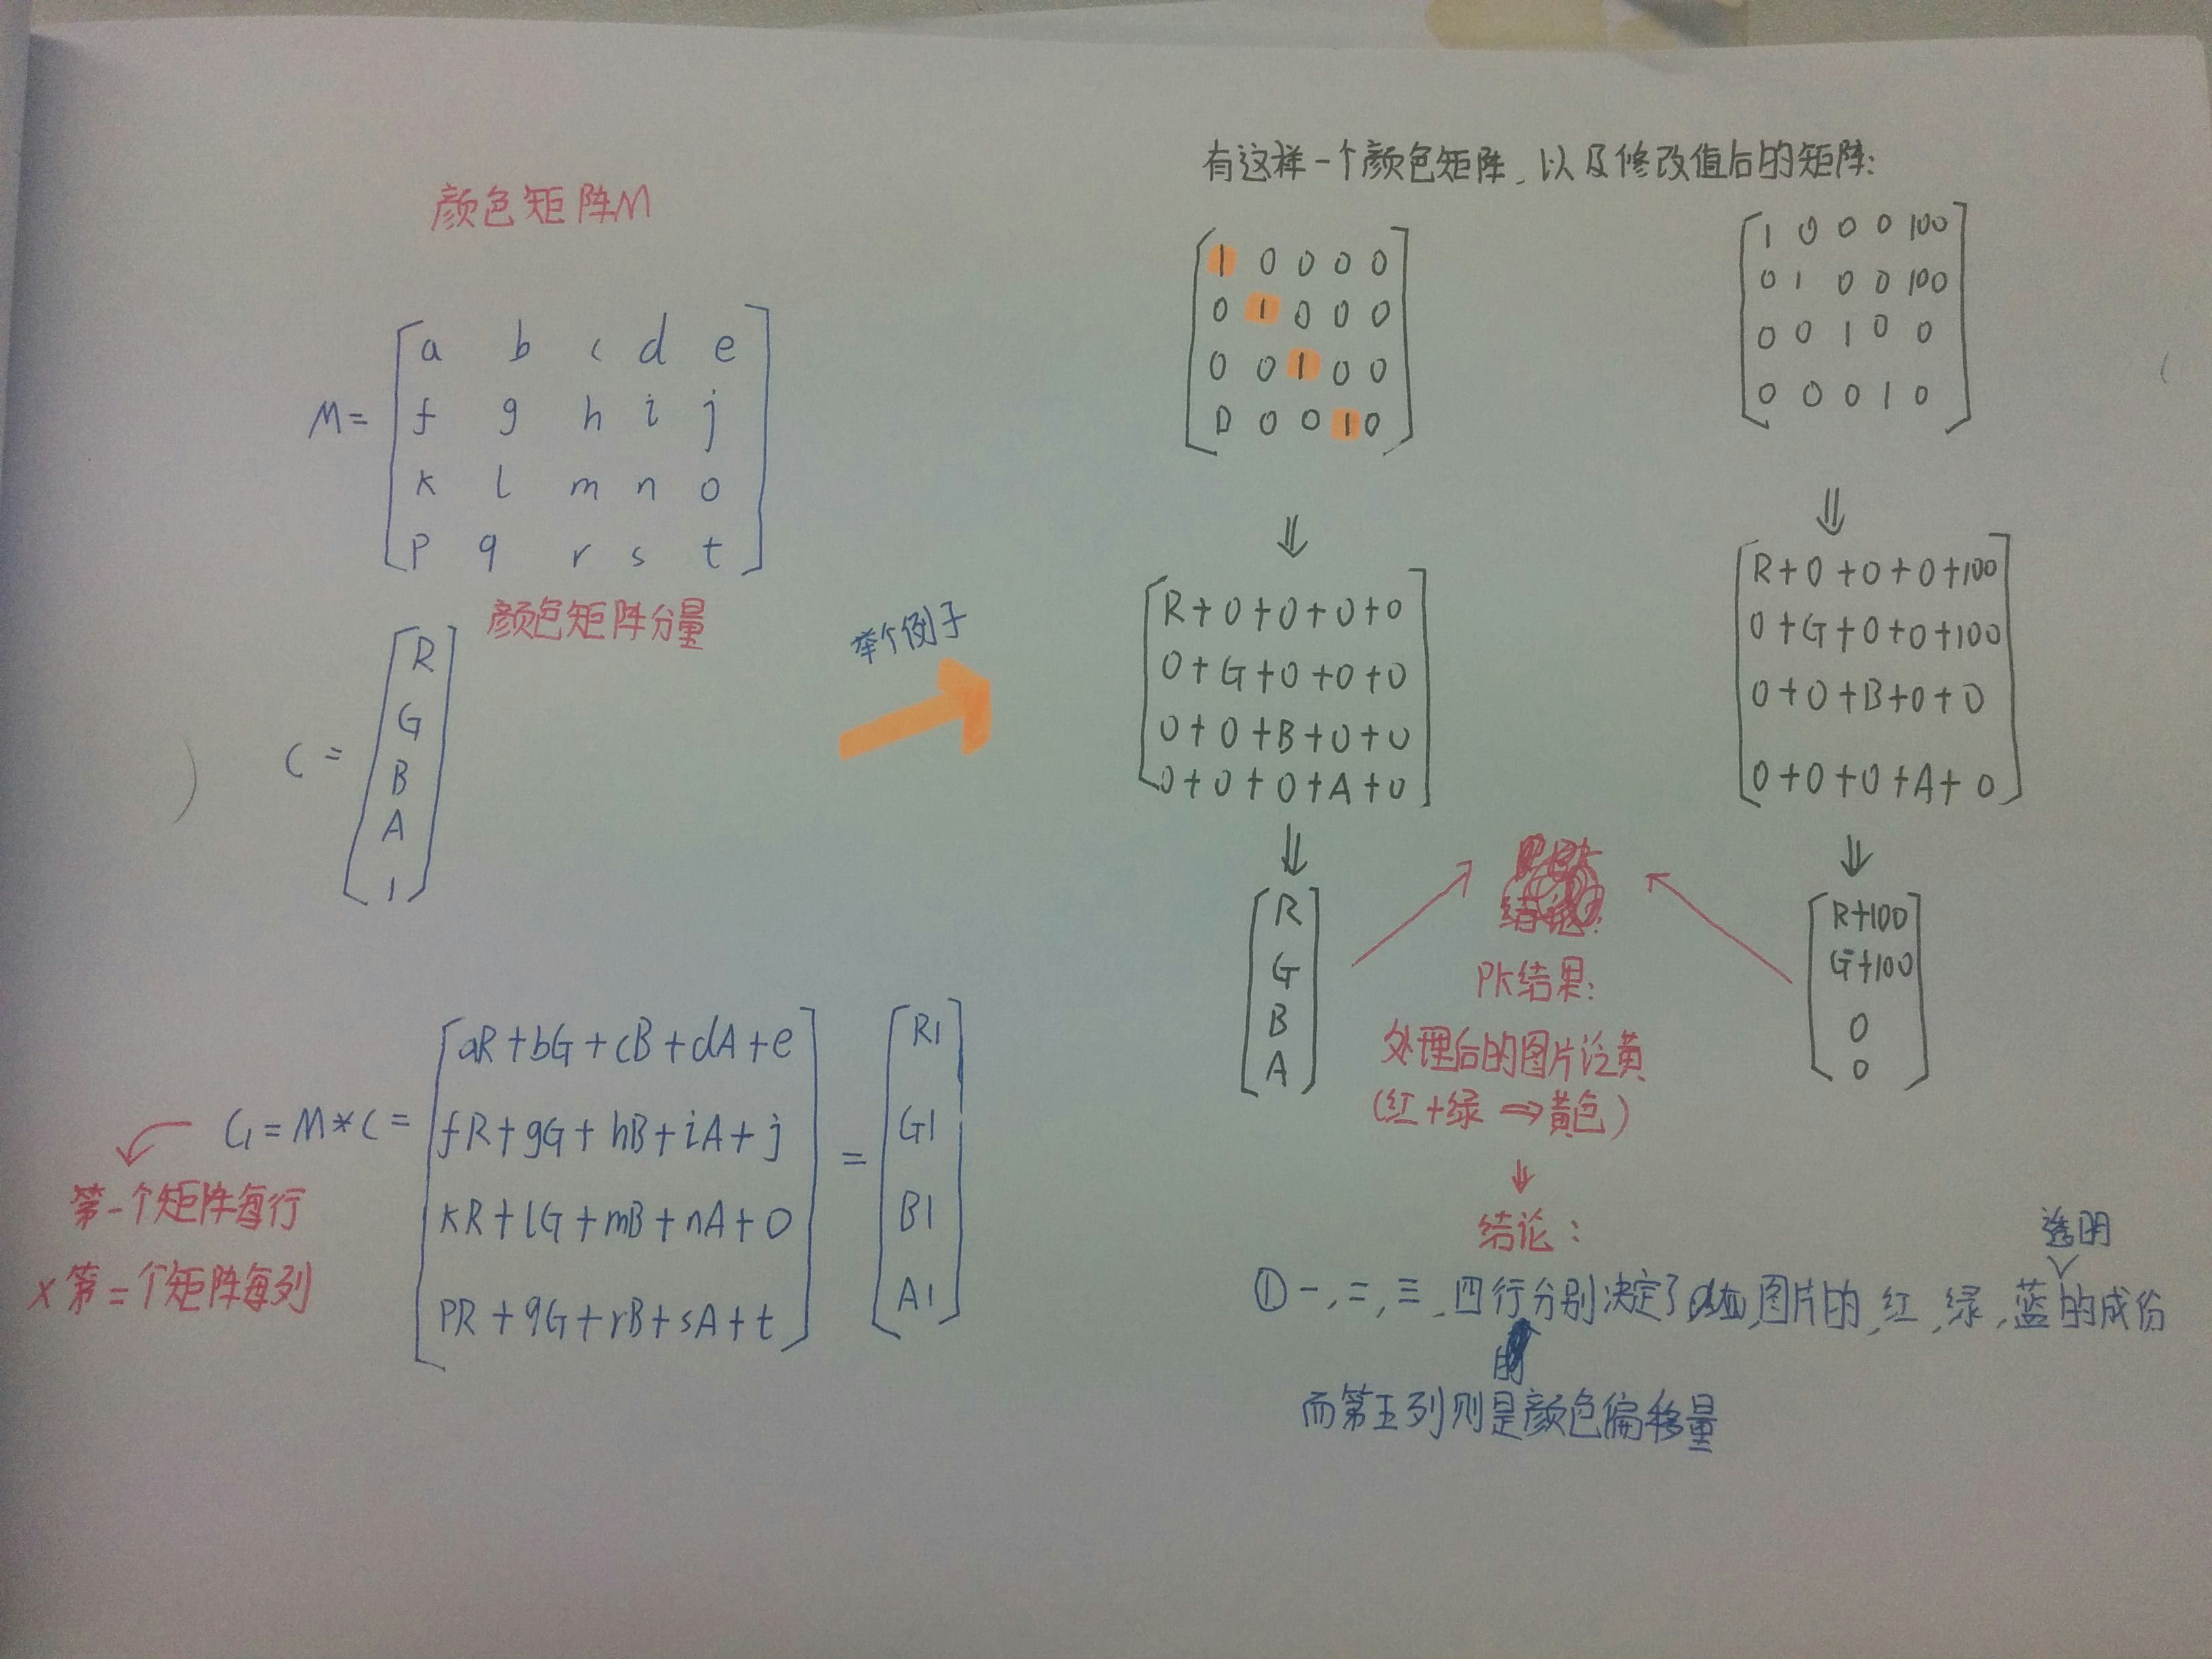
不知道你看懂上图没,如果你学过高数的话,肯定对此很熟悉,无非是矩阵的叉乘而已,没学过也没关系 计算方法就是右下角那个,拿颜色矩阵的每一行来 * 颜色矩阵分量的每一列!
很典型的一个例子,处理前后的结果比较,我们还可以让某个颜色值 * 一个常数,比如让第三行(蓝) 乘以2,效果就变成泛蓝色了,当然,我们肯定要写代码来验证验证上面的结果!
3.写代码来验证ColorMatrix所起的作用
依次是原图,泛黄,泛绿,泛红,高对比度,色相变换,以及黄色复古
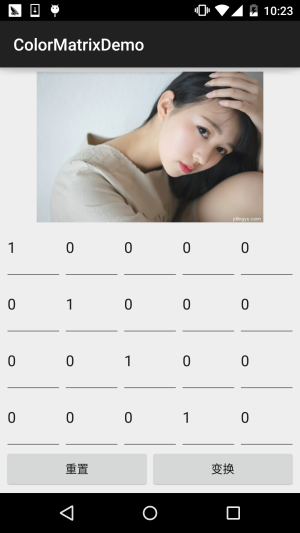
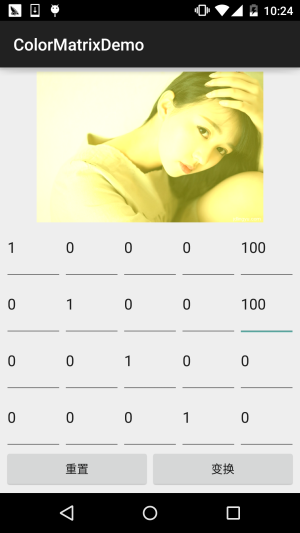
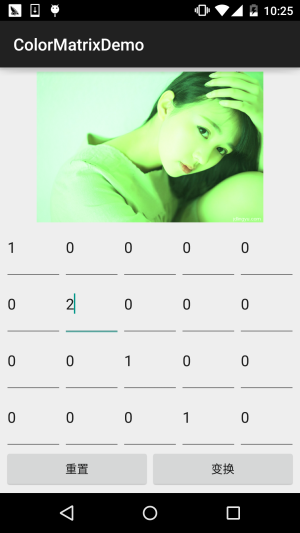
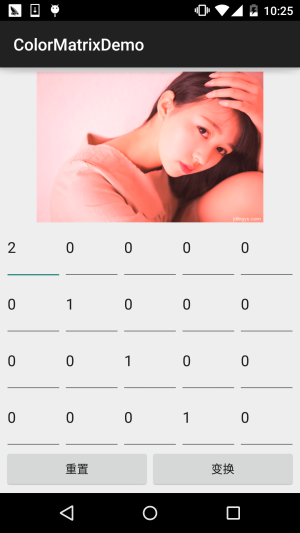
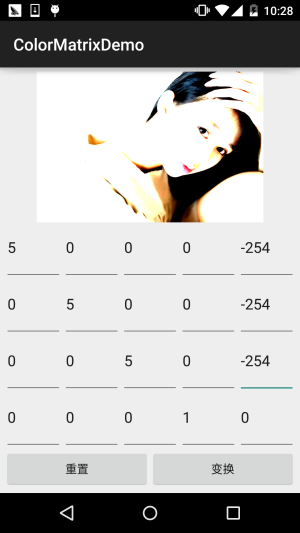
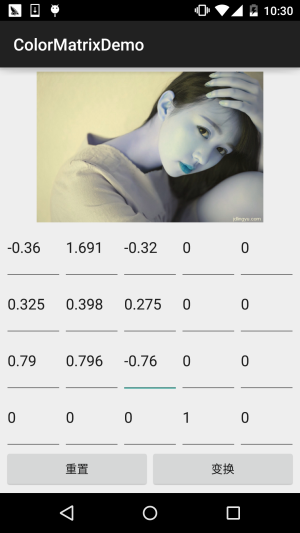
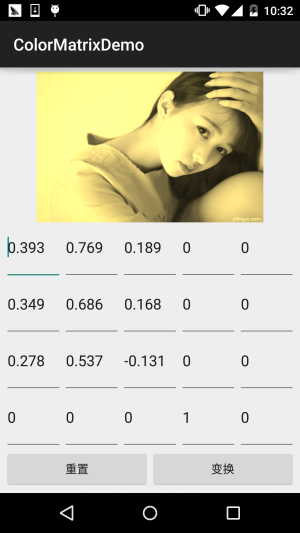
接下来我们来写代码,完成上述的效果: 代码实现:
首先是布局文件activity_main.xml:
<?xml version="1.0" encoding="utf-8"?>
<LinearLayout xmlns:android="http://schemas.android.com/apk/res/android"
    android:layout_width="match_parent"
    android:layout_height="match_parent"
    android:orientation="vertical"
    android:padding="5dp">

    <ImageView
        android:id="@+id/img_show"
        android:layout_width="match_parent"
        android:layout_height="0dp"
        android:layout_weight="2" />

    <GridLayout
        android:id="@+id/gp_matrix"
        android:layout_width="match_parent"
        android:layout_height="0dp"
        android:layout_weight="3"
        android:columnCount="5"
        android:rowCount="4"></GridLayout>

    <LinearLayout
        android:layout_width="match_parent"
        android:layout_height="wrap_content"
        android:orientation="horizontal">
        <Button
            android:id="@+id/btn_reset"
            android:layout_width="0dp"
            android:layout_height="wrap_content"
            android:layout_weight="1"
            android:text="重置" />
        <Button
            android:id="@+id/btn_Change"
            android:layout_width="0dp"
            android:layout_height="wrap_content"
            android:layout_weight="1"
            android:text="变换" />
    </LinearLayout>
</LinearLayout>
接着是MainActivity.java:
public class MainActivity extends AppCompatActivity implements View.OnClickListener {

    private ImageView img_show;
    private GridLayout gp_matrix;
    private Button btn_reset;
    private Button btn_Change;
    private Bitmap mBitmap;
    private int mEtWidth, mEtHeight;
    private EditText[] mEts = new EditText[20];
    private float[] mColorMatrix = new float[20];
    private Context mContext;


    @Override
    protected void onCreate(Bundle savedInstanceState) {
        super.onCreate(savedInstanceState);
        setContentView(R.layout.activity_main);
        mContext = MainActivity.this;
        bindViews();


        gp_matrix.post(new Runnable() {
            @Override
            public void run() {
                mEtWidth = gp_matrix.getWidth() / 5;
                mEtHeight = gp_matrix.getHeight() / 4;
                //添加5 * 4个EditText
                for (int i = 0; i < 20; i++) {
                    EditText editText = new EditText(mContext);
                    mEts[i] = editText;
                    gp_matrix.addView(editText, mEtWidth, mEtHeight);
                }
                initMatrix();
            }
        });
    }

    private void bindViews() {
        img_show = (ImageView) findViewById(R.id.img_show);
        gp_matrix = (GridLayout) findViewById(R.id.gp_matrix);
        btn_reset = (Button) findViewById(R.id.btn_reset);
        btn_Change = (Button) findViewById(R.id.btn_Change);

        mBitmap = BitmapFactory.decodeResource(getResources(), R.mipmap.img_meizi);
        img_show.setImageBitmap(mBitmap);

        btn_reset.setOnClickListener(this);
        btn_Change.setOnClickListener(this);
    }


    //定义一个初始化颜色矩阵的方法
    private void initMatrix() {
        for (int i = 0; i < 20; i++) {
            if (i % 6 == 0) {
                mEts[i].setText(String.valueOf(1));
            } else {
                mEts[i].setText(String.valueOf(0));
            }
        }
    }

    //定义一个获取矩阵值得方法
    private void getMatrix() {
        for (int i = 0; i < 20; i++) {
            mColorMatrix[i] = Float.valueOf(mEts[i].getText().toString());
        }
    }

    //根据颜色矩阵的值来处理图片
    private void setImageMatrix() {
        Bitmap bmp = Bitmap.createBitmap(mBitmap.getWidth(), mBitmap.getHeight(),
                Bitmap.Config.ARGB_8888);
        android.graphics.ColorMatrix colorMatrix = new android.graphics.ColorMatrix();
        colorMatrix.set(mColorMatrix);

        Canvas canvas = new Canvas(bmp);
        Paint paint = new Paint(Paint.ANTI_ALIAS_FLAG);
        paint.setColorFilter(new ColorMatrixColorFilter(colorMatrix));
        canvas.drawBitmap(mBitmap, 0, 0, paint);
        img_show.setImageBitmap(bmp);
    }

    @Override
    public void onClick(View v) {
        switch (v.getId()) {
            case R.id.btn_Change:
                getMatrix();
                setImageMatrix();
                break;
            case R.id.btn_reset:
                initMatrix();
                getMatrix();
                setImageMatrix();
                break;
        }
    }
}
代码非常的简单,就加载布局,然后往GridLayout里面塞 5 * 4 个EditText,这里用 post()方法是为了保证GridLayout加载完毕后才去获取长宽,不然在获取GridLayout长 宽的时候可是获取不到值的!接着定义了三个方法,初始矩阵,获取矩阵值,以及根据 矩阵值来处理图片~是不是很简单咧~
不过到这里你可能有一点疑问:
4.使用ColorMatrix的三个方法处理图像
运行效果图:
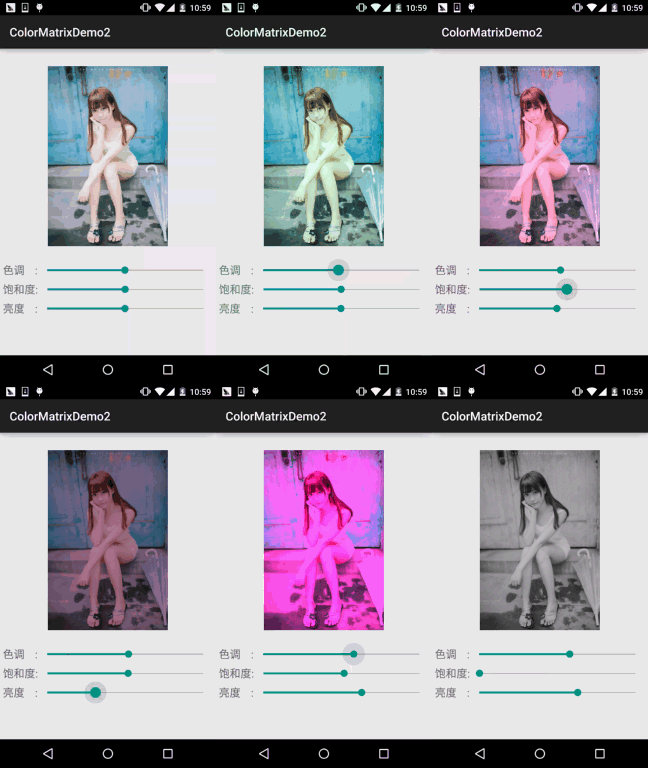
代码实现:
首先我们来编写一个图片处理的工具类,我们传入Bitmap,色相,饱和度以及亮度,处理后,返回 处理后的图片:ImageHelper.java:
/**
 * Created by Jay on 2015/10/28 0028.
 */
public class ImageHelper {
    /**
     * 该方法用来处理图像,根据色调,饱和度,亮度来调节
     *
     * @param bm:要处理的图像
     * @param hue:色调
     * @param saturation:饱和度
     * @param lum:亮度
     *
     */
    public static Bitmap handleImageEffect(Bitmap bm, float hue, float saturation, float lum) {
        Bitmap bmp = Bitmap.createBitmap(bm.getWidth(), bm.getHeight(), Bitmap.Config.ARGB_8888);
        Canvas canvas = new Canvas(bmp);
        Paint paint = new Paint(Paint.ANTI_ALIAS_FLAG);

        ColorMatrix hueMatrix = new ColorMatrix();
        hueMatrix.setRotate(0, hue);    //0代表R,红色
        hueMatrix.setRotate(1, hue);    //1代表G,绿色
        hueMatrix.setRotate(2, hue);    //2代表B,蓝色

        ColorMatrix saturationMatrix = new ColorMatrix();
        saturationMatrix.setSaturation(saturation);

        ColorMatrix lumMatrix = new ColorMatrix();
        lumMatrix.setScale(lum, lum, lum, 1);


        ColorMatrix imageMatrix = new ColorMatrix();
        imageMatrix.postConcat(hueMatrix);
        imageMatrix.postConcat(saturationMatrix);
        imageMatrix.postConcat(lumMatrix);

        paint.setColorFilter(new ColorMatrixColorFilter(imageMatrix));
        canvas.drawBitmap(bm, 0, 0, paint);

        return bmp;
    }
}
接下来我们把布局也撸出来,activity_main.xml:
<?xml version="1.0" encoding="utf-8"?>
<RelativeLayout xmlns:android="http://schemas.android.com/apk/res/android"
    android:layout_width="match_parent"
    android:layout_height="match_parent"
    android:orientation="vertical"
    android:padding="5dp">

    <ImageView
        android:id="@+id/img_meizi"
        android:layout_width="300dp"
        android:layout_height="300dp"
        android:layout_centerHorizontal="true"
        android:layout_marginBottom="24dp"
        android:layout_marginTop="24dp" />


    <TextView
        android:id="@+id/txt_hue"
        android:layout_width="wrap_content"
        android:layout_height="32dp"
        android:layout_below="@id/img_meizi"
        android:gravity="center"
        android:text="色调    :"
        android:textSize="18sp" />

    <SeekBar
        android:id="@+id/sb_hue"
        android:layout_width="match_parent"
        android:layout_height="32dp"
        android:layout_below="@id/img_meizi"
        android:layout_toRightOf="@id/txt_hue" />


    <TextView
        android:id="@+id/txt_saturation"
        android:layout_width="wrap_content"
        android:layout_height="32dp"
        android:layout_below="@id/txt_hue"
        android:gravity="center"
        android:text="饱和度:"
        android:textSize="18sp" />

    <SeekBar
        android:id="@+id/sb_saturation"
        android:layout_width="match_parent"
        android:layout_height="32dp"
        android:layout_below="@id/sb_hue"
        android:layout_toRightOf="@id/txt_saturation" />


    <TextView
        android:id="@+id/txt_lun"
        android:layout_width="wrap_content"
        android:layout_height="32dp"
        android:layout_below="@id/txt_saturation"
        android:gravity="center"
        android:text="亮度    :"
        android:textSize="18sp" />

    <SeekBar
        android:id="@+id/sb_lum"
        android:layout_width="match_parent"
        android:layout_height="32dp"
        android:layout_below="@id/sb_saturation"
        android:layout_toRightOf="@id/txt_lun" />

</RelativeLayout>
最后是我们的MainActivity.java:
public class MainActivity extends AppCompatActivity implements SeekBar.OnSeekBarChangeListener{

    private ImageView img_meizi;
    private SeekBar sb_hue;
    private SeekBar sb_saturation;
    private SeekBar sb_lum;
    private final static int MAX_VALUE = 255;
    private final static int MID_VALUE = 127;
    private float mHue = 0.0f;
    private float mStauration = 1.0f;
    private float mLum = 1.0f;
    private Bitmap mBitmap;


    @Override
    protected void onCreate(Bundle savedInstanceState) {
        super.onCreate(savedInstanceState);
        setContentView(R.layout.activity_main);
        mBitmap = BitmapFactory.decodeResource(getResources(), R.mipmap.img_meizi);
        bindViews();
    }

    private void bindViews() {
        img_meizi = (ImageView) findViewById(R.id.img_meizi);
        sb_hue = (SeekBar) findViewById(R.id.sb_hue);
        sb_saturation = (SeekBar) findViewById(R.id.sb_saturation);
        sb_lum = (SeekBar) findViewById(R.id.sb_lum);

        img_meizi.setImageBitmap(mBitmap);
        sb_hue.setMax(MAX_VALUE);
        sb_hue.setProgress(MID_VALUE);
        sb_saturation.setMax(MAX_VALUE);
        sb_saturation.setProgress(MID_VALUE);
        sb_lum.setMax(MAX_VALUE);
        sb_lum.setProgress(MID_VALUE);

        sb_hue.setOnSeekBarChangeListener(this);
        sb_saturation.setOnSeekBarChangeListener(this);
        sb_lum.setOnSeekBarChangeListener(this);

    }

    @Override
    public void onProgressChanged(SeekBar seekBar, int progress, boolean fromUser) {
        switch (seekBar.getId()) {
            case R.id.sb_hue:
                mHue = (progress - MID_VALUE) * 1.0F / MID_VALUE * 180;
                break;
            case R.id.sb_saturation:
                mStauration = progress * 1.0F / MID_VALUE;
                break;
            case R.id.sb_lum:
                mLum = progress * 1.0F / MID_VALUE;
                break;
        }
        img_meizi.setImageBitmap(ImageHelper.handleImageEffect(mBitmap, mHue, mStauration, mLum));
    }

    @Override
    public void onStartTrackingTouch(SeekBar seekBar) {}

    @Override
    public void onStopTrackingTouch(SeekBar seekBar) {}
}
代码同样很简单,这里就不讲解了~
5.本节代码示例下载:
ColorMatrixDemo.zip
ColorMatrixDemo2.zip


