本节引言:
1.SeekBar基本用法
好吧,基本用法其实很简单,常用的属性无非就下面这几个常用的属性,Java代码里只要setXxx即可:
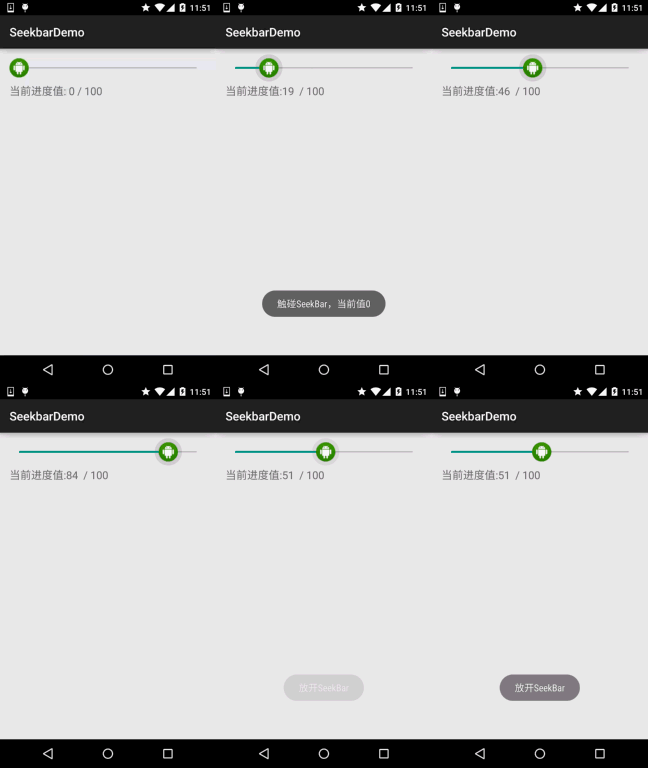
接着要说下SeekBar的事件了,SeekBar.OnSeekBarChangeListener 我们只需重写三个对应的方法:
简单的代码示例:
效果图:

实现代码:
public class MainActivity extends AppCompatActivity {

    private SeekBar sb_normal;
    private TextView txt_cur;
    private Context mContext;

    @Override
    protected void onCreate(Bundle savedInstanceState) {
        super.onCreate(savedInstanceState);
        setContentView(R.layout.activity_main);
        mContext = MainActivity.this;
        bindViews();
    }

    private void bindViews() {
        sb_normal = (SeekBar) findViewById(R.id.sb_normal);
        txt_cur = (TextView) findViewById(R.id.txt_cur);
        sb_normal.setOnSeekBarChangeListener(new SeekBar.OnSeekBarChangeListener() {
            @Override
            public void onProgressChanged(SeekBar seekBar, int progress, boolean fromUser) {
                txt_cur.setText("当前进度值:" + progress + "  / 100 ");
            }

            @Override
            public void onStartTrackingTouch(SeekBar seekBar) {
                Toast.makeText(mContext, "触碰SeekBar", Toast.LENGTH_SHORT).show();
            }

            @Override
            public void onStopTrackingTouch(SeekBar seekBar) {
                Toast.makeText(mContext, "放开SeekBar", Toast.LENGTH_SHORT).show();
            }
        });
    }
}
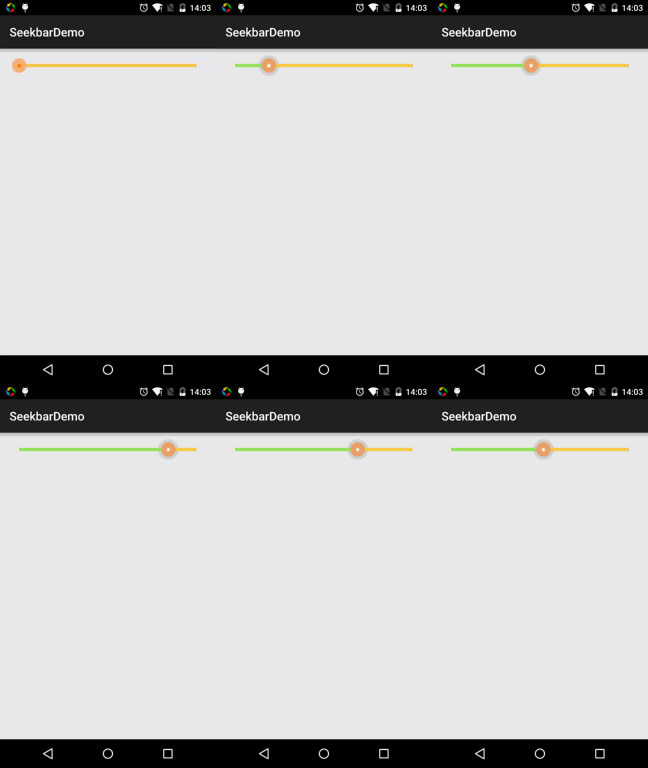
2.简单SeekBar定制:
代码实例:
运行效果图:

代码实现: 1.滑块状态Drawable:sb_thumb.xml
<?xml version="1.0" encoding="utf-8"?>
<selector xmlns:android="http://schemas.android.com/apk/res/android">
    <item android:state_pressed="true" android:drawable="@mipmap/seekbar_thumb_pressed"/>
    <item android:state_pressed="false" android:drawable="@mipmap/seekbar_thumb_normal"/>
</selector>
贴下素材:


2.条形栏Bar的Drawable:sb_bar.xml
这里用到一个layer-list的drawable资源!其实就是层叠图片,依次是:背景,二级进度条,当前进度:
<?xml version="1.0" encoding="utf-8"?>
<layer-list
    xmlns:android="http://schemas.android.com/apk/res/android">
    <item android:id="@android:id/background">
        <shape>
            <solid android:color="#FFFFD042" />
        </shape>
    </item>
    <item android:id="@android:id/secondaryProgress">
        <clip>
            <shape>
                <solid android:color="#FFFFFFFF" />
            </shape>
        </clip>
    </item>
    <item android:id="@android:id/progress">
        <clip>
            <shape>
                <solid android:color="#FF96E85D" />
            </shape>
        </clip>
    </item>
</layer-list>
3.然后布局引入SeekBar后,设置下progressDrawable与thumb即可!
<SeekBar
        android:id="@+id/sb_normal"
        android:layout_width="match_parent"
        android:layout_height="wrap_content"
        android:maxHeight="5.0dp"
        android:minHeight="5.0dp"
        android:progressDrawable="@drawable/sb_bar"
        android:thumb="@drawable/sb_thumb"/>
就是这么简单!
本节小结:
好的,关于SeekBar就到这里,谢谢大家~


